I started another project for my drummer Jason's nephew, Nolan. Apparently his birthday is coming up and and this 16 yr old needs a respectable guitar to play on instead of the POS Dean he has...
I thought I'd document as much as I could. I kept forgetting to take pictures but I think I got most of it through the process.
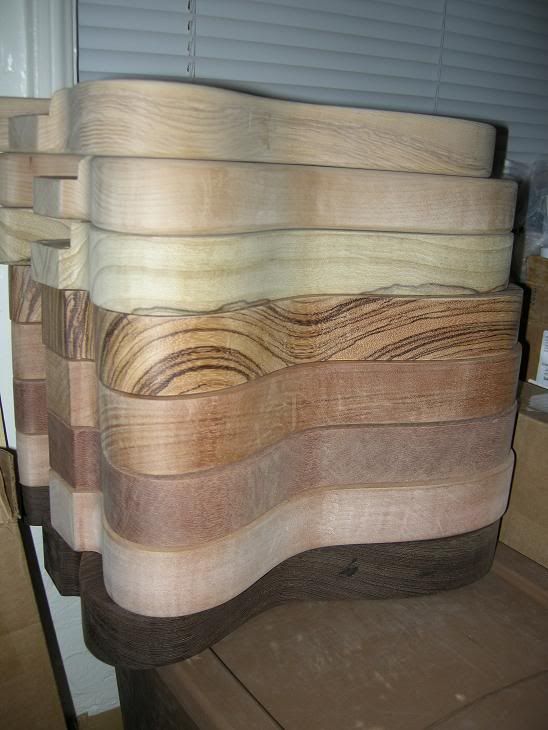
First thing is to get a board from the lumber store. Usually they are trimmed up for the most part. The board I chose was 8/4 Ash. 8/4 means there are eight 1/4", meaning 2", but usually that translates to 1.75". A standard Fender body is 1.75" thick so we are good to go. G2G! I need 13" at the widest bout so its either find a 13" wide piece (difficult to find) or glue up two boards to make the 13" (easier to do). I select an 8" wide board that is 10ft long, which will allow me to make 3 complete bodies. My typical searching sizes is 7+" x 40" for one center joined guitar blank, although have used as short as 7"x 36". Knowing these sizes I have the lumber store chop them into three identically lengthened pieces.
I know I only need two 7"x16" pieces, but I measure out 20" as that is the typical length for a Stratocaster style body. Since this is already mostly sanded on the faces, I can skip the thickness sanding portion of the build. So next step would be using the miter saw (aka the chop saw) to chop the correct lengths for both halves. The chop saw has a 1/8" wide blade, so you have to factor that material disappearing in your lengths. No big deal here since I have an extra ~4". Usually before I do the actual cutting I trace half the template on the raw wood to see what grain shapes will be in the body. Below you can see that the center sections will have mostly straight grains, and towards the edges there's a little flair akin to what you'd see around a knot, or a growth ring.
 Once the board is split, I'll want to glue the pieces together with little to no gaps. In order to bring the pieces together seamlessly, the joints need to be perfectly flat and perpendicular to the faces as bumps and dips cause air gaps an dlack of strength when gluing. First is to get the perpendicular face - aka getting it "square". To do this you use a table saw, as it's blade is 90 degrees to the table. Set the fence so that you are taking off no more than an 1/8" at a time. Use a push stick to push the board into the fence as you feed it thru. This keeps the board from "fish-tailing" during the cut.
 With a good blade your cut will be perfectly flat. Unfortunately mine never are, so you have to get the side smoother. Normally you would use a jointer to create this, but I'm not a fan of my jointer, so I use my router and a straight edge to replicate the function of the jointer. The straight edge is a clamp/ruler-mix and so far it has worked like a charm. I'm using a 36" clamp I bought from Rockler. Since this is center joined, its not excessively crucial to align grain direction perfectly parallel...just close enough so the straight grain doesn't create a V shape. The board is clamped and I use a 2" top bearing router bit to cut the stock.
 Once these joints are made, you glue up the pieces. I forgot the photos from this step, but you essentially use a wood glue (I use Titebond), spread the glue out like you are painting the face of it (ie. no bare wood showing) and squeeze the crap out of the pieces so the glue dribbles out. Try to maintain minimal "lip'ing" in the process. I use my fingers to determine if the faces are equal. Occasionally I get a "lip" and I have to sand it down so that the center is smooth. Fortunately the drum sander will solve this issue. Generally I'll glue them up in the evening, and leave the clamps on overnight so that in the morning they are fine to start cutting into. Below is the glued product.
  After the blank is joined (like above), you trace your shape on the wood, chop off any excess portions with the bandsaw, and drill your reference locations. I always use the center line for everything, since all my bodies are built by hand. I use the neck plates holes for reference, and two of the string thru holes. To maintain a cleanness and for wood grip, I only drill partially through the wood, not all the way through.
After the reference holes are drilled, I go back to the band saw and cut the wood so that there is maybe a 1/32" excess around my drawing. I have a few spare templates due to mess ups that I use as a visual reference since the bandsaw tends to shake the body to where its a little difficult to be precise on where to cut.
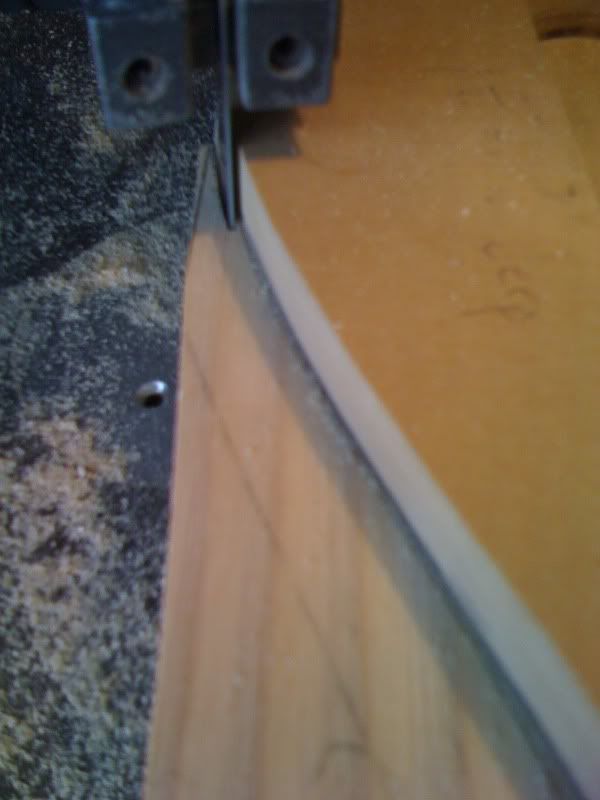
When you are done with the bandsaw a second time, you'll have something close to a shape...like this...


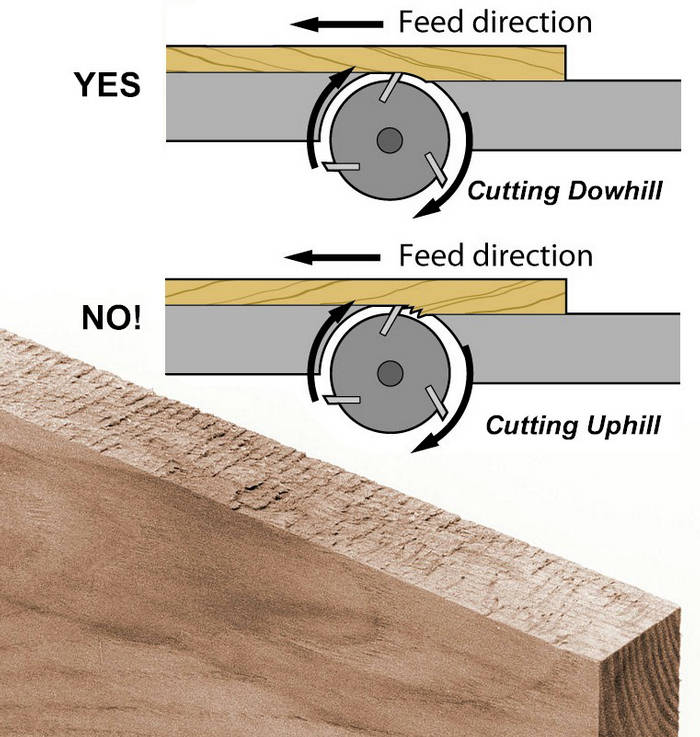
Here's another photo that describes the direction to cut.
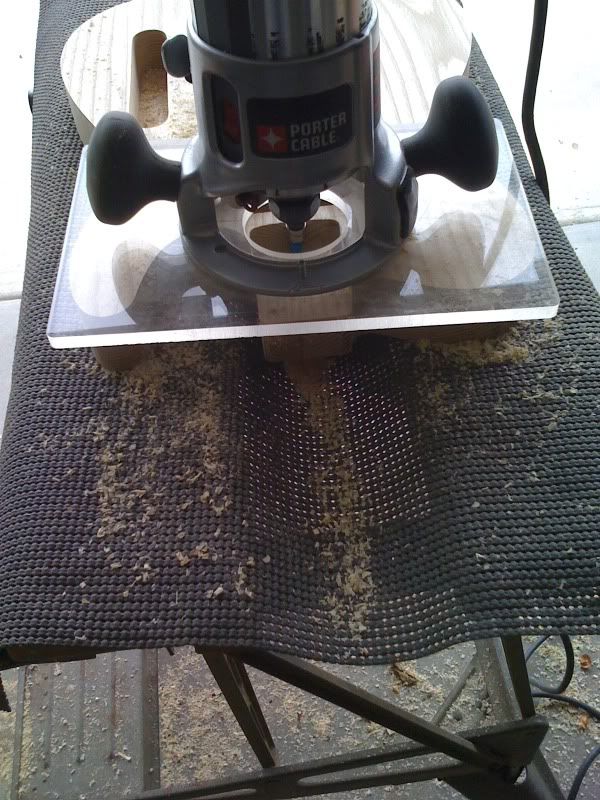
 Once the basic shaping is done you can start into the pickup channels. I leave the round over and neck pocket for last since having the template solid in place is key for the pickup channels. Generally I drill 90% of the depth with a Forestner bit and rout the final depth. Forestner bits are good as they leave a smooth circular cut. Regular bits leave a frayed circle. The downside to Forestners is that there is a center alignment point that is about an 1/8" deep, so you'll get a bunch of little drill dots in the process. Kind like I got in this photo (from another build). Doing the final depth with a router bit leaves a flat bottom.
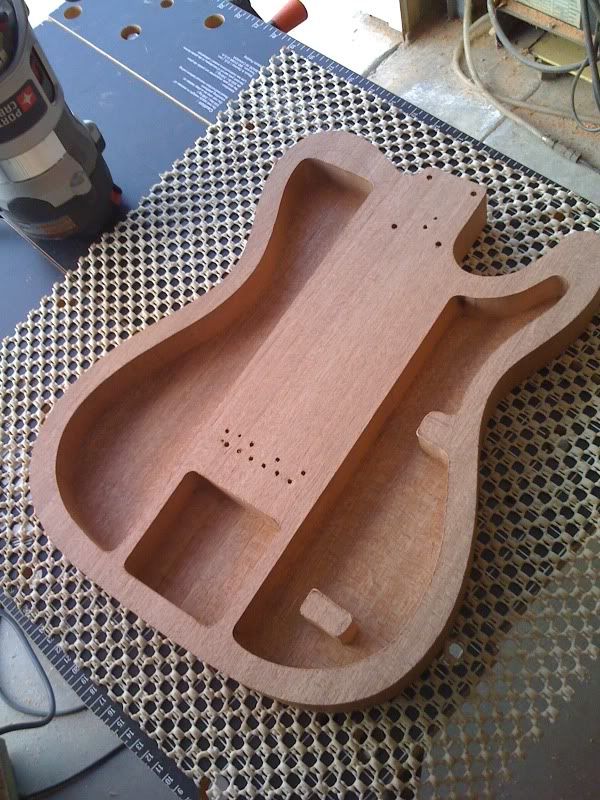
Here's pics of the pickup channels and the control channel cut. The control channel has a 1/4" bottom (ie. 1.5" are cut away), so usually I'll cut 1" depth with my 1" long bit, then remove the template and run the bearing on the previously cut area to get the final depth.

And the end result

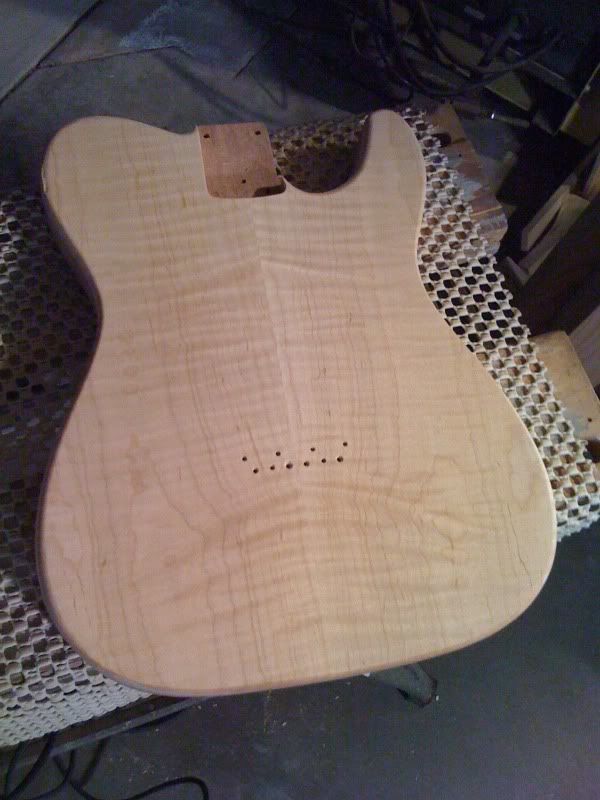
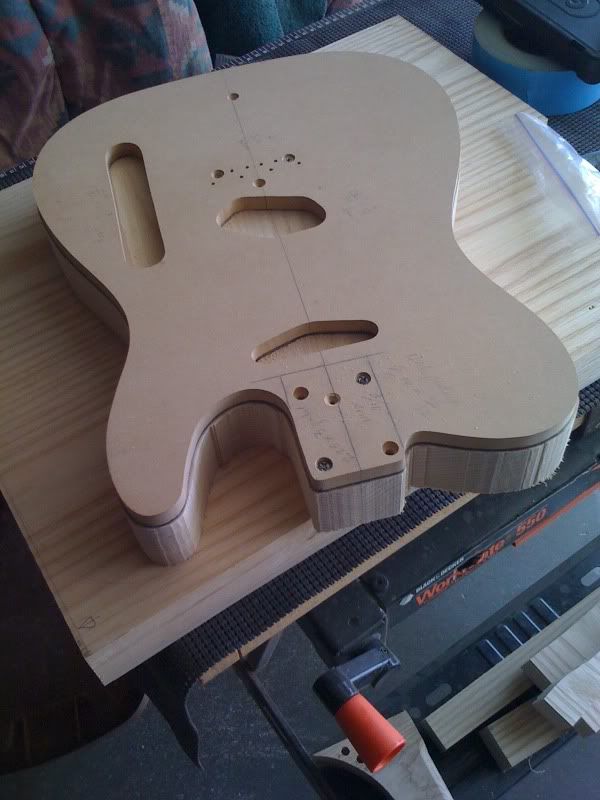
Once this is done I have cut the neck pocket and round the body over.
 After all that I hand sand the body from 80 grit to 120 grit to 180 grit to 220 grit. I use an orbital sander for the faces and slide it along most of the edges. Inside the horn and over the round-over is all hand sanding. Once you are done with that it's off to finishing. Usually I build the guitar up just to make sure all the parts are aligned first, then I finish it.
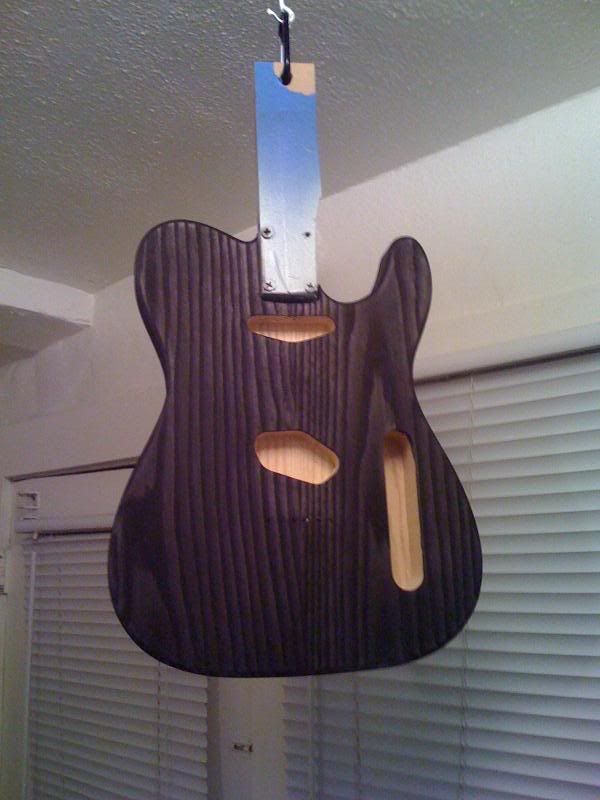
On that note...this guitar body is done, and is off to the finishing stage. This guitar is going to get a transparent black stain, sealed, filled, and then a thin gloss coat of Nitrocellulous lacquer. More on that in the next blog. In the meantime here's a teaser of the body...